Modules
Short-term rentals
Not yet verifiedThis article hasn't been checked against the current app yet. Some steps may describe features that aren't live.
Short-term rentals give renters and their guests access for the length of a stay. They show in the console only when your community has the short-term rental module.
Set up a property for short-term rentals
Reservations can only be made for properties set up as short-term rentals.
- Go to Administration, open the property and click Edit property. For a new property, use Add property.
- Under Type, choose Rental.
- Under Tenancy, choose Short-term.
- Under Managed by, choose Owner or Manager.
- Click Save changes.
If Short-term isn’t offered, your community doesn’t have the short-term rental module. The form says so. Ask Ramco to turn it on.
Set your community’s check-in and check-out times
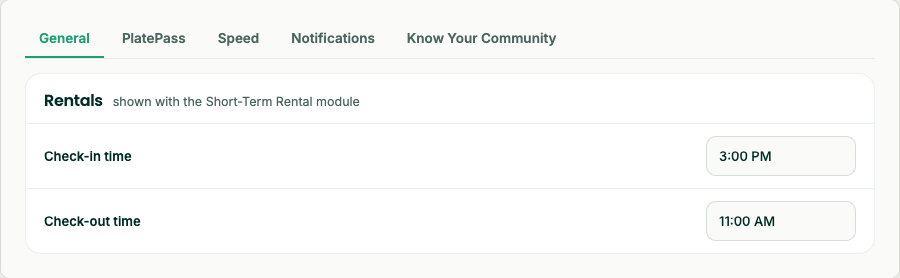
Your community has one usual check-in time and one usual check-out time. New reservations start with them.
- Go to Settings and open the General tab.
- In the Rentals panel, set the Check-in time and Check-out time.
- Click Save changes at the top of the page.
The Rentals panel shows only when your community has the short-term rental module.
Reservations
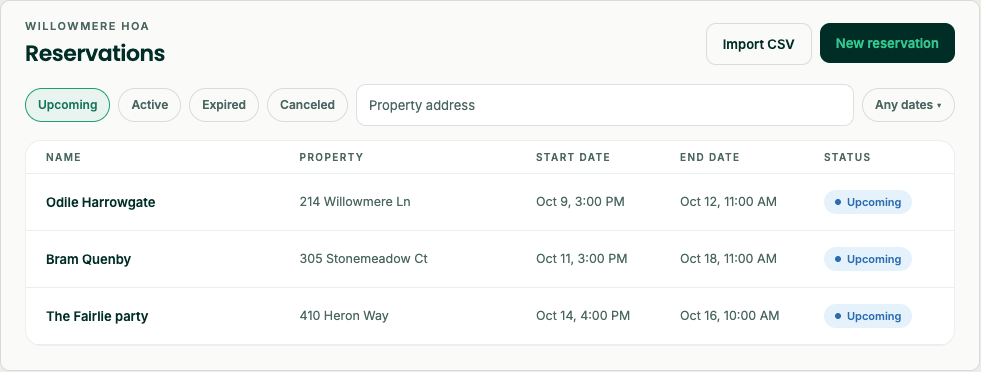
Create and change reservations under Reservations in the left rail. It’s there only when your community has short-term rentals.
The list shows each reservation’s Name, Property, Start date, End date and Status:
| Status | What it means |
|---|---|
| Upcoming | The stay hasn’t started yet. |
| Active | The guest is staying now. |
| Expired | The stay is over. |
| Canceled | The stay was canceled. |
Click a status chip to show only those reservations. To narrow the list further, type a property address, or pick dates under Any dates.
Rental managers see only the reservations for the properties they manage.
Add a reservation
- Click New reservation.
- Enter the Client reservation ID if the booking has one, for example from your booking system, and pick the Property.
- Enter the guest’s First name and Last name.
- Check the Check-in and Check-out dates and times. The times start at your community’s usual check-in and check-out times.
- Click Create reservation.
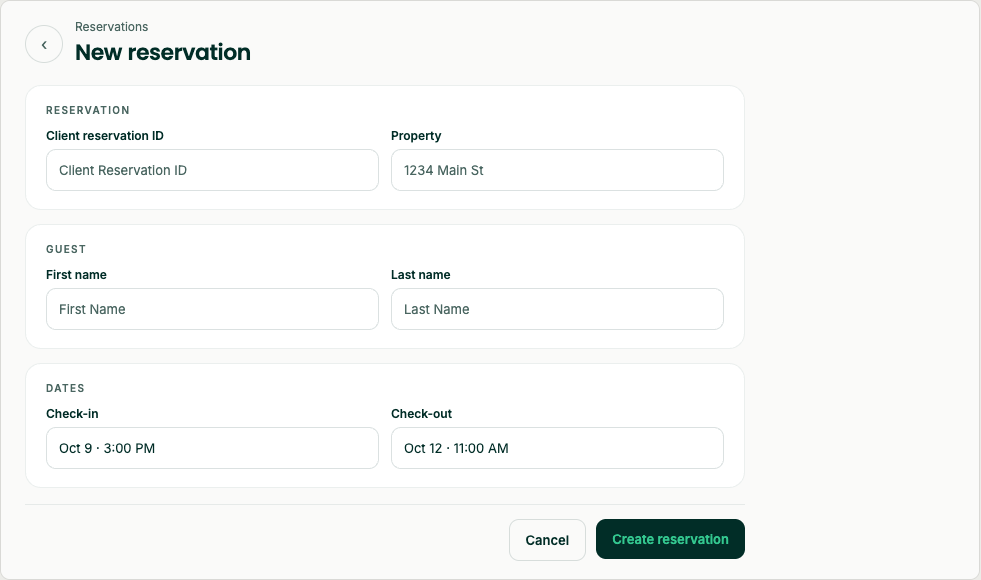
To change a reservation, click it in the list. It opens in the same form, filled in.
Import reservations
To add many reservations at once, click Import CSV and choose a CSV file. SAGE tells you which rows were added and which weren’t, with the reason for each.
See who’s staying
Activity › Rentals is a read-only list of stays at your community’s rental properties. It shows who is staying, the size of their party, which property and which dates, and their gate record. Messages between the host and the renter stay between them and never show here.
Click a property in the list to open it in Administration. To change a stay, open it in Reservations.
Need help?
Questions? Contact us at support@sagesystems.io.