Modules
Short-term rentals
Last verified: October 3, 2026This guide is for the SAGE app (version 3) and management portal you use today. See the guide for the new apps.
Short-term rentals let you give renters and their guests access for the length of a stay. They appear in the portal only when the feature is enabled for your community, and only for managers with the Rental Manager permission.
There are two separate versions, and your left menu may show one or both:
- A Short-term Rentals heading with a Reservations item. See Short-term Rentals menu.
- A Reservations heading with Reservations and Create Reservation items. See Reservations menu.
Short-term Rentals menu
Set up a unit for short-term rentals
Reservations can only be made for units set up as short-term rentals.
- Go to Administration and open the unit.
- Click the three-dot menu on the unit card and choose Rent.
- Select the Short-Term tab.
- Choose who manages the unit’s reservations: pick one or more Rental Managers, or tick Owner managed. Choose + Add new manager to invite a new rental manager.
- Click Save.
The unit becomes a Rental and gets a Rental Managers tab. Use Add Manager there to change the managers, or a manager’s Remove Manager action to take them off the unit. A rental manager who is assigned to specific units only sees reservations for those units.
If no managers cover all rentals in your community, you must pick at least one rental manager or tick Owner managed.
See reservations
Go to Short-term Rentals > Reservations. The list shows each reservation’s Name, Property, Start Date, End Date and Status:
| Status | Meaning |
|---|---|
| Upcoming | The stay hasn’t started yet. |
| Active | The stay is in progress. |
| Expired | The check-out time has passed. Access has been removed. |
| Canceled | The reservation was canceled. Access has been removed. |
Filter by property address, status and dates, then click Apply. Reset clears the filters. Click a reservation to open it.
Create a reservation
- Click New Reservation.
- Under Address, choose the short-term rental unit.
- Set the Check-in Date, Check-in Time, Check-out Date and Check-out Time.
- Under Renter, enter their phone number or email to look them up, then fill in First Name, Last Name and Phone Number. Email Address is optional.
- Under Guests, click Add Guest for each person staying with them.
- Click Create and Send Invite.
The renter and each guest are sent an invitation. Once they accept it, they have access from check-in to check-out. The confirmation reads “Reservation created successfully and invite sent!”
The check-in can’t be in the past, check-out must be after check-in, and a reservation can’t overlap another reservation at the same unit.
Default check-in and check-out times come from Settings > Rental Management.
Change or cancel a reservation
Open the reservation to see Edit Reservation. While it is Upcoming or Active you can change the dates and times or add and remove guests, then click Update Reservation. To cancel, click Cancel Reservation, then Yes, Cancel. Canceling removes the renter’s and guests’ access and any one-time codes made for the stay.
Reservations menu
Go to Reservations > Reservations to see your reservations, with their Name, Check-in Date, Check-out Date, Reservation ID and Status (Active or Inactive). Search by last name, address or ID, or set the Check-In From and To dates.
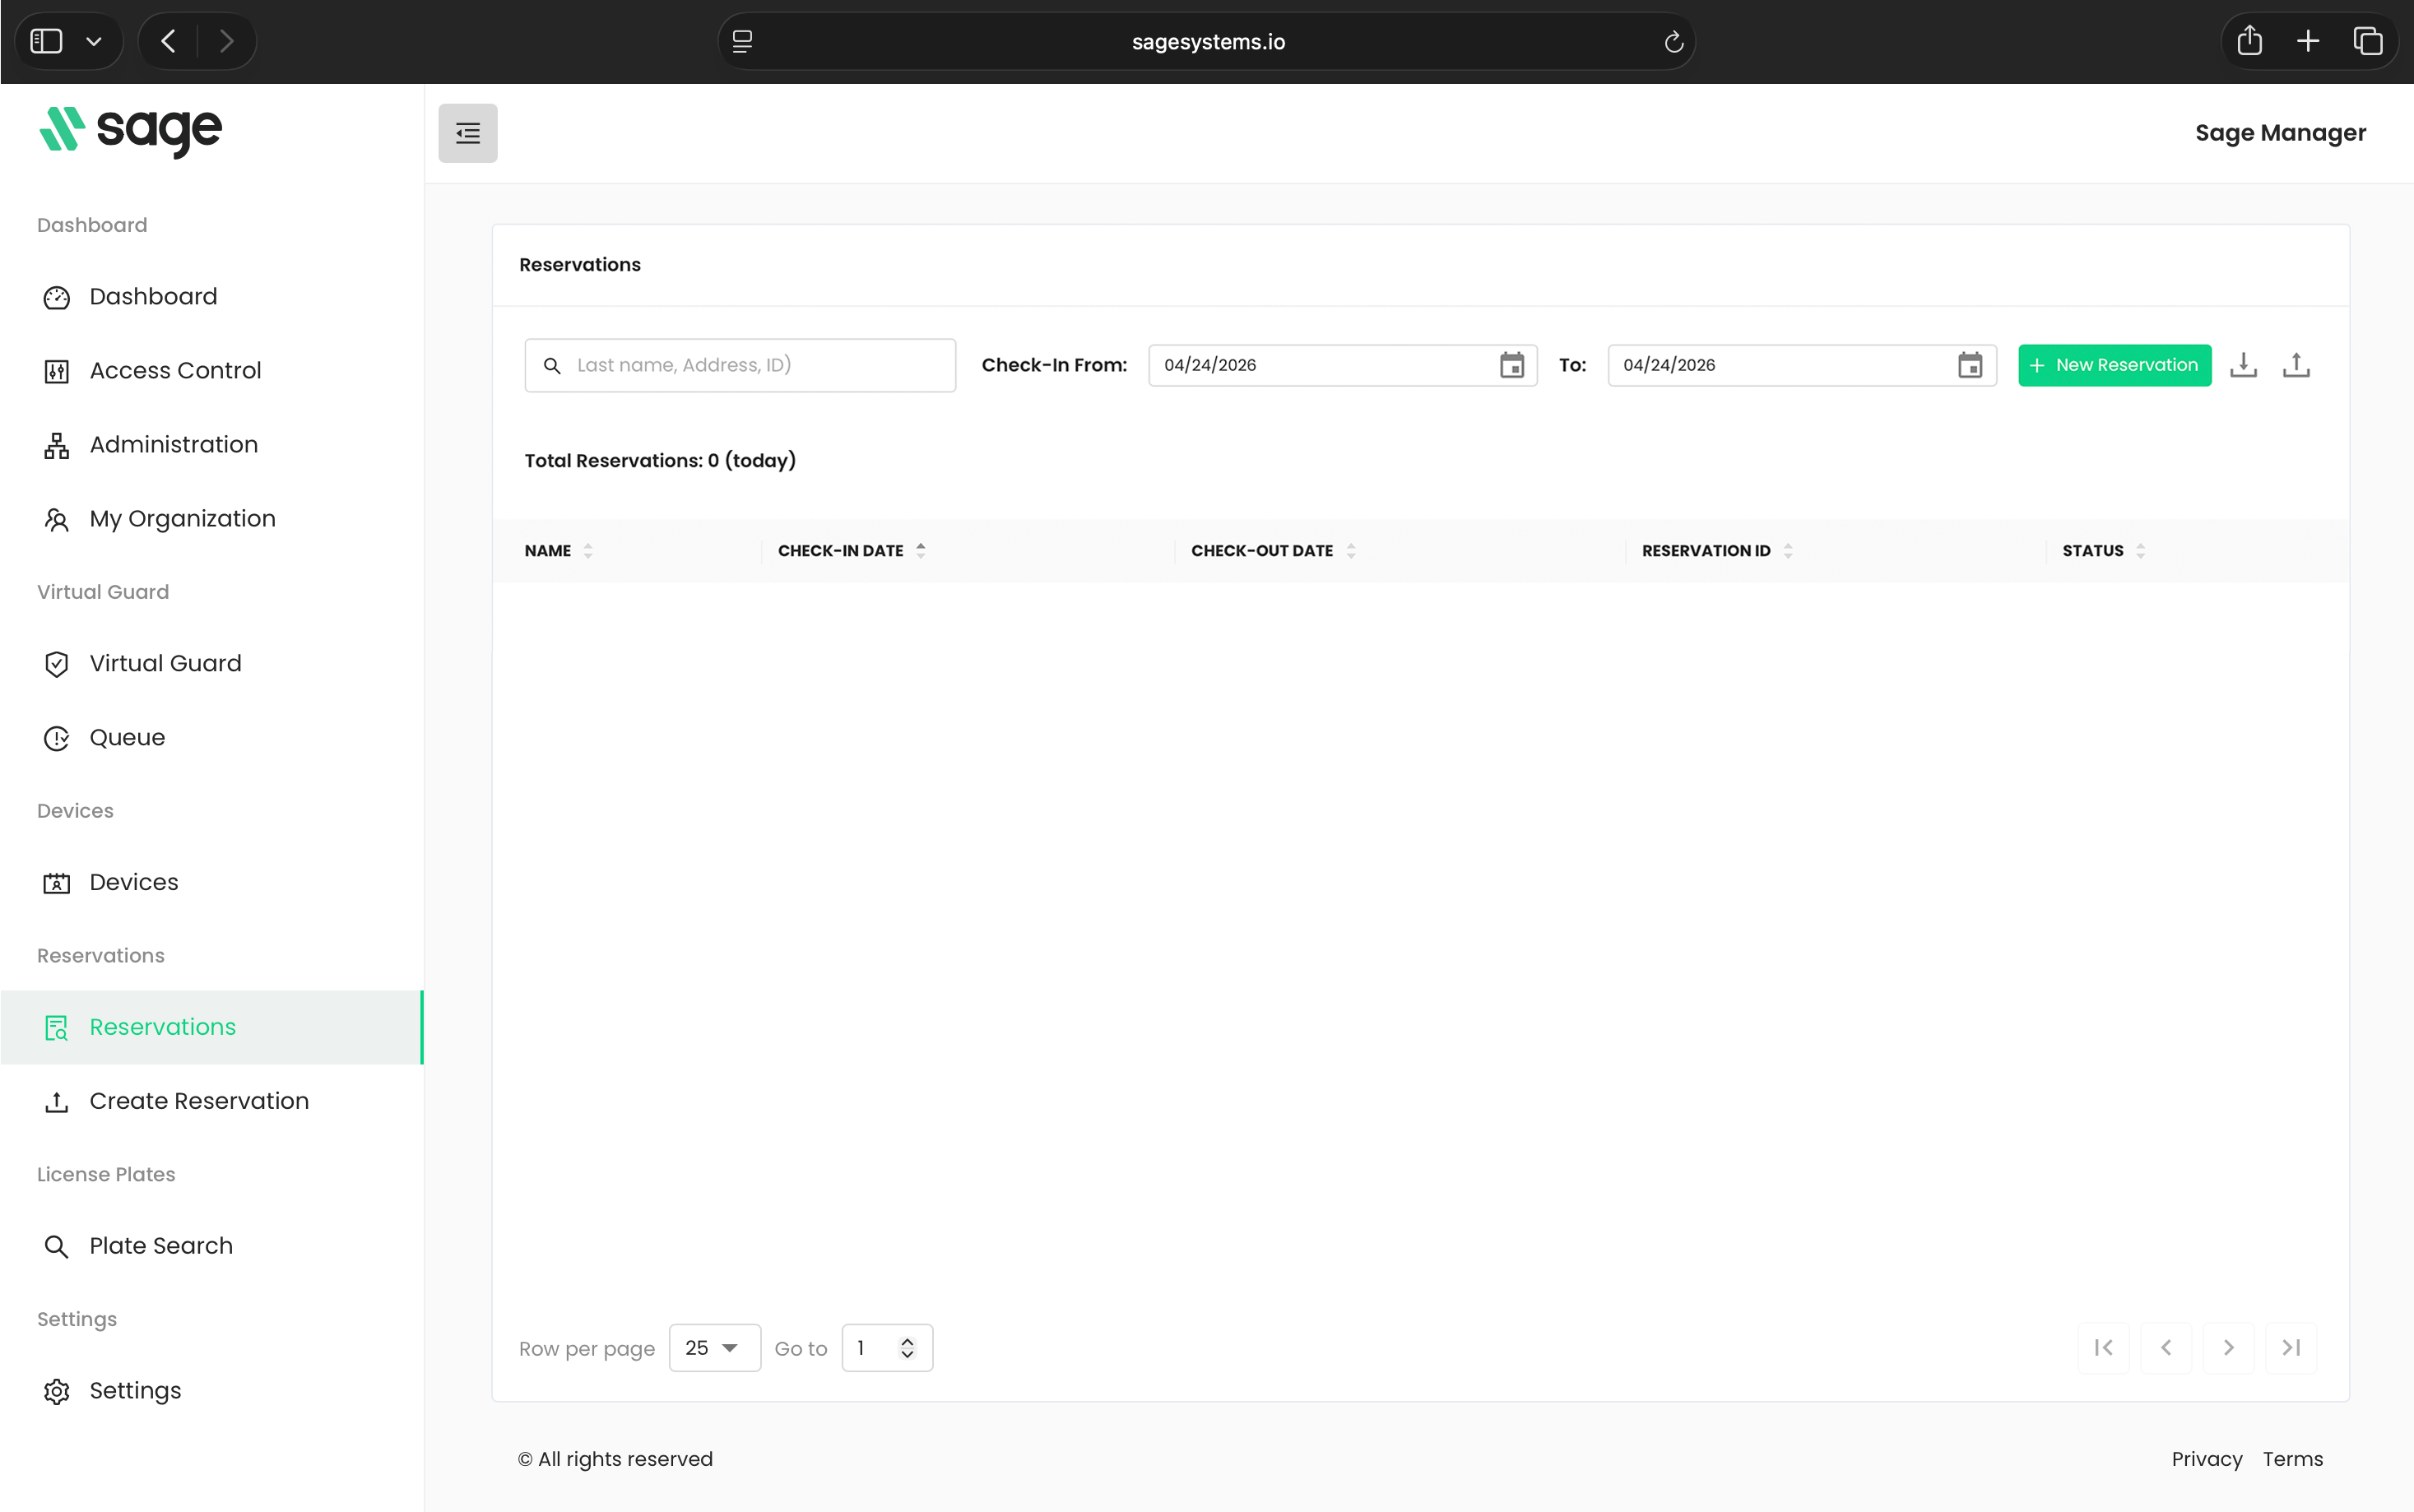
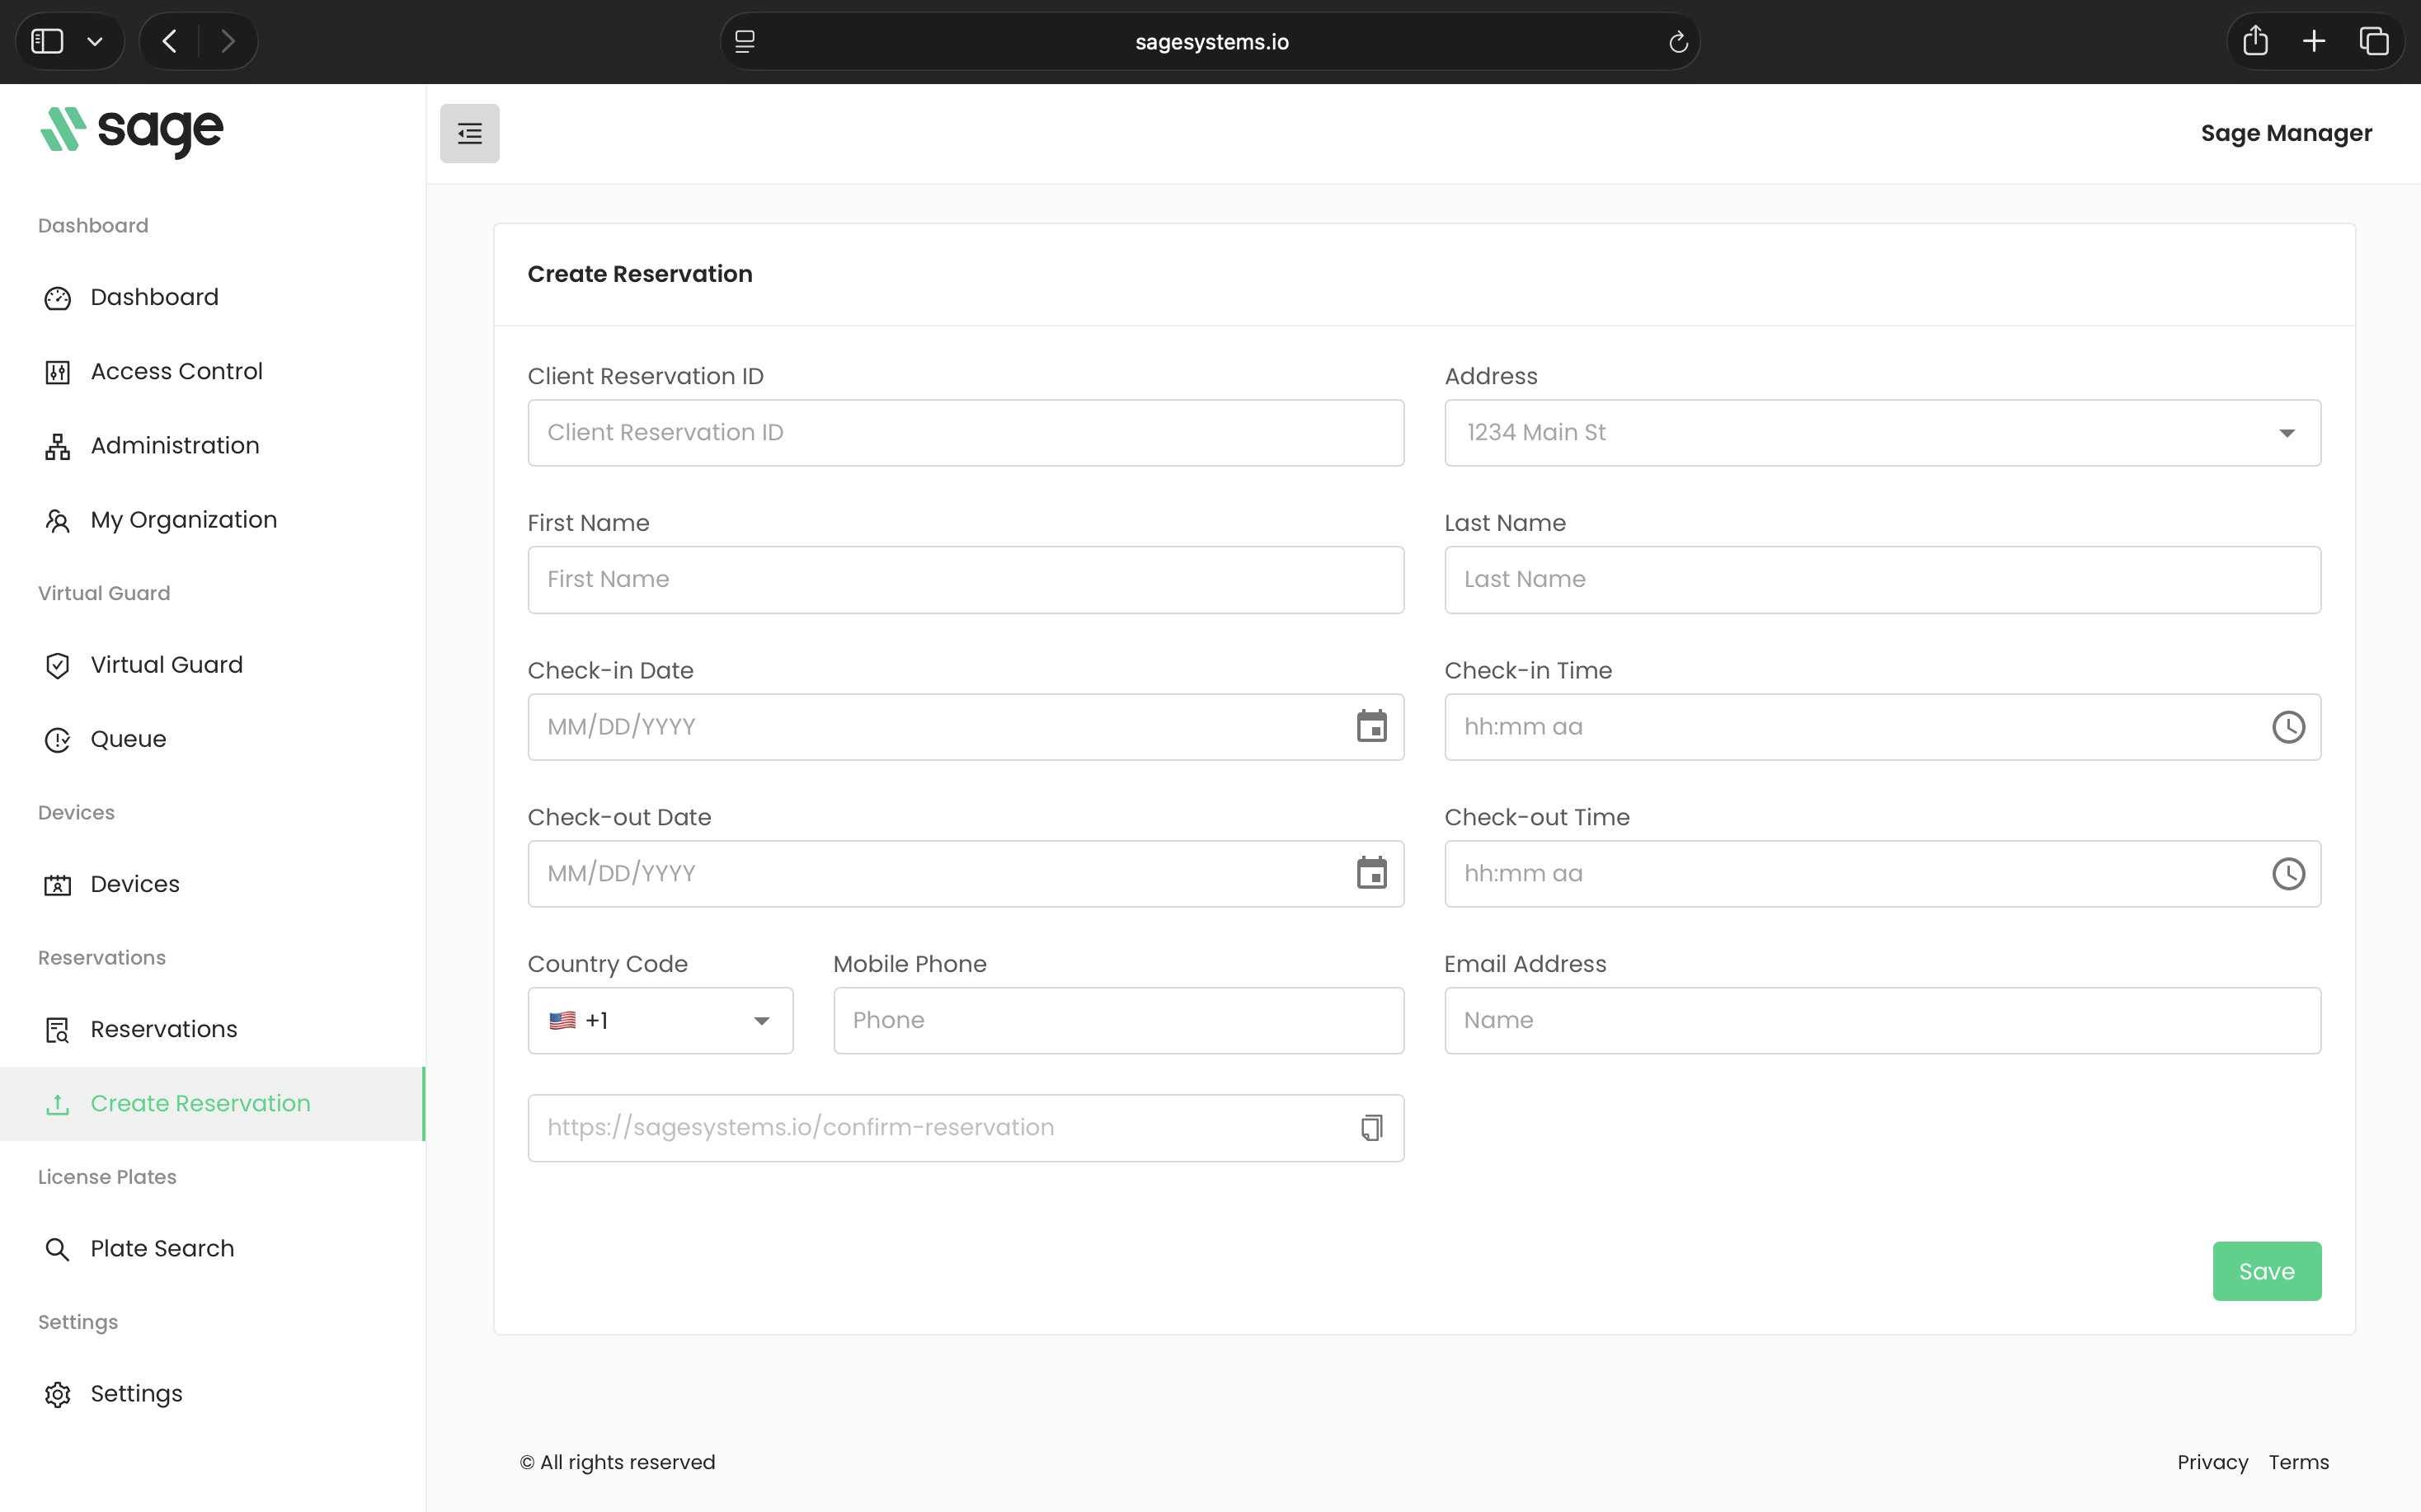
To add one, click New Reservation, or go to Reservations > Create Reservation:
- Enter the Client Reservation ID if you use one, and the Address.
- Enter the guest’s First Name and Last Name.
- Set the Check-in Date and Check-out Date, and the times if needed.
- Add a Mobile Phone (with Country Code) and an Email Address if you have them.
- Click Save.
SAGE shows “Success! Reservation has been created.” The reservation is saved with access from check-in to check-out.
The form also shows a read-only reservation link with a copy button. It is the same link for every reservation.
Need help?
Questions? Contact us at support@sagesystems.io.