People
My organization
Last verified: October 3, 2026This guide is for the SAGE app (version 3) and management portal you use today. See the guide for the new apps.
My Organization is where you manage your own team and the people who get access on behalf of the community itself, rather than a particular unit: team members, community guests and visitors, one-time codes, and the community’s own vehicles and devices.
You need the Org Dashboard permission to open it. Each tab’s add and edit buttons also need a matching permission, listed below. Without it, you can see the tab but not change it.
Tabs
| Tab | What it holds | Permission to make changes |
|---|---|---|
| Team Members | Managers and staff with portal access. | Manage Operators |
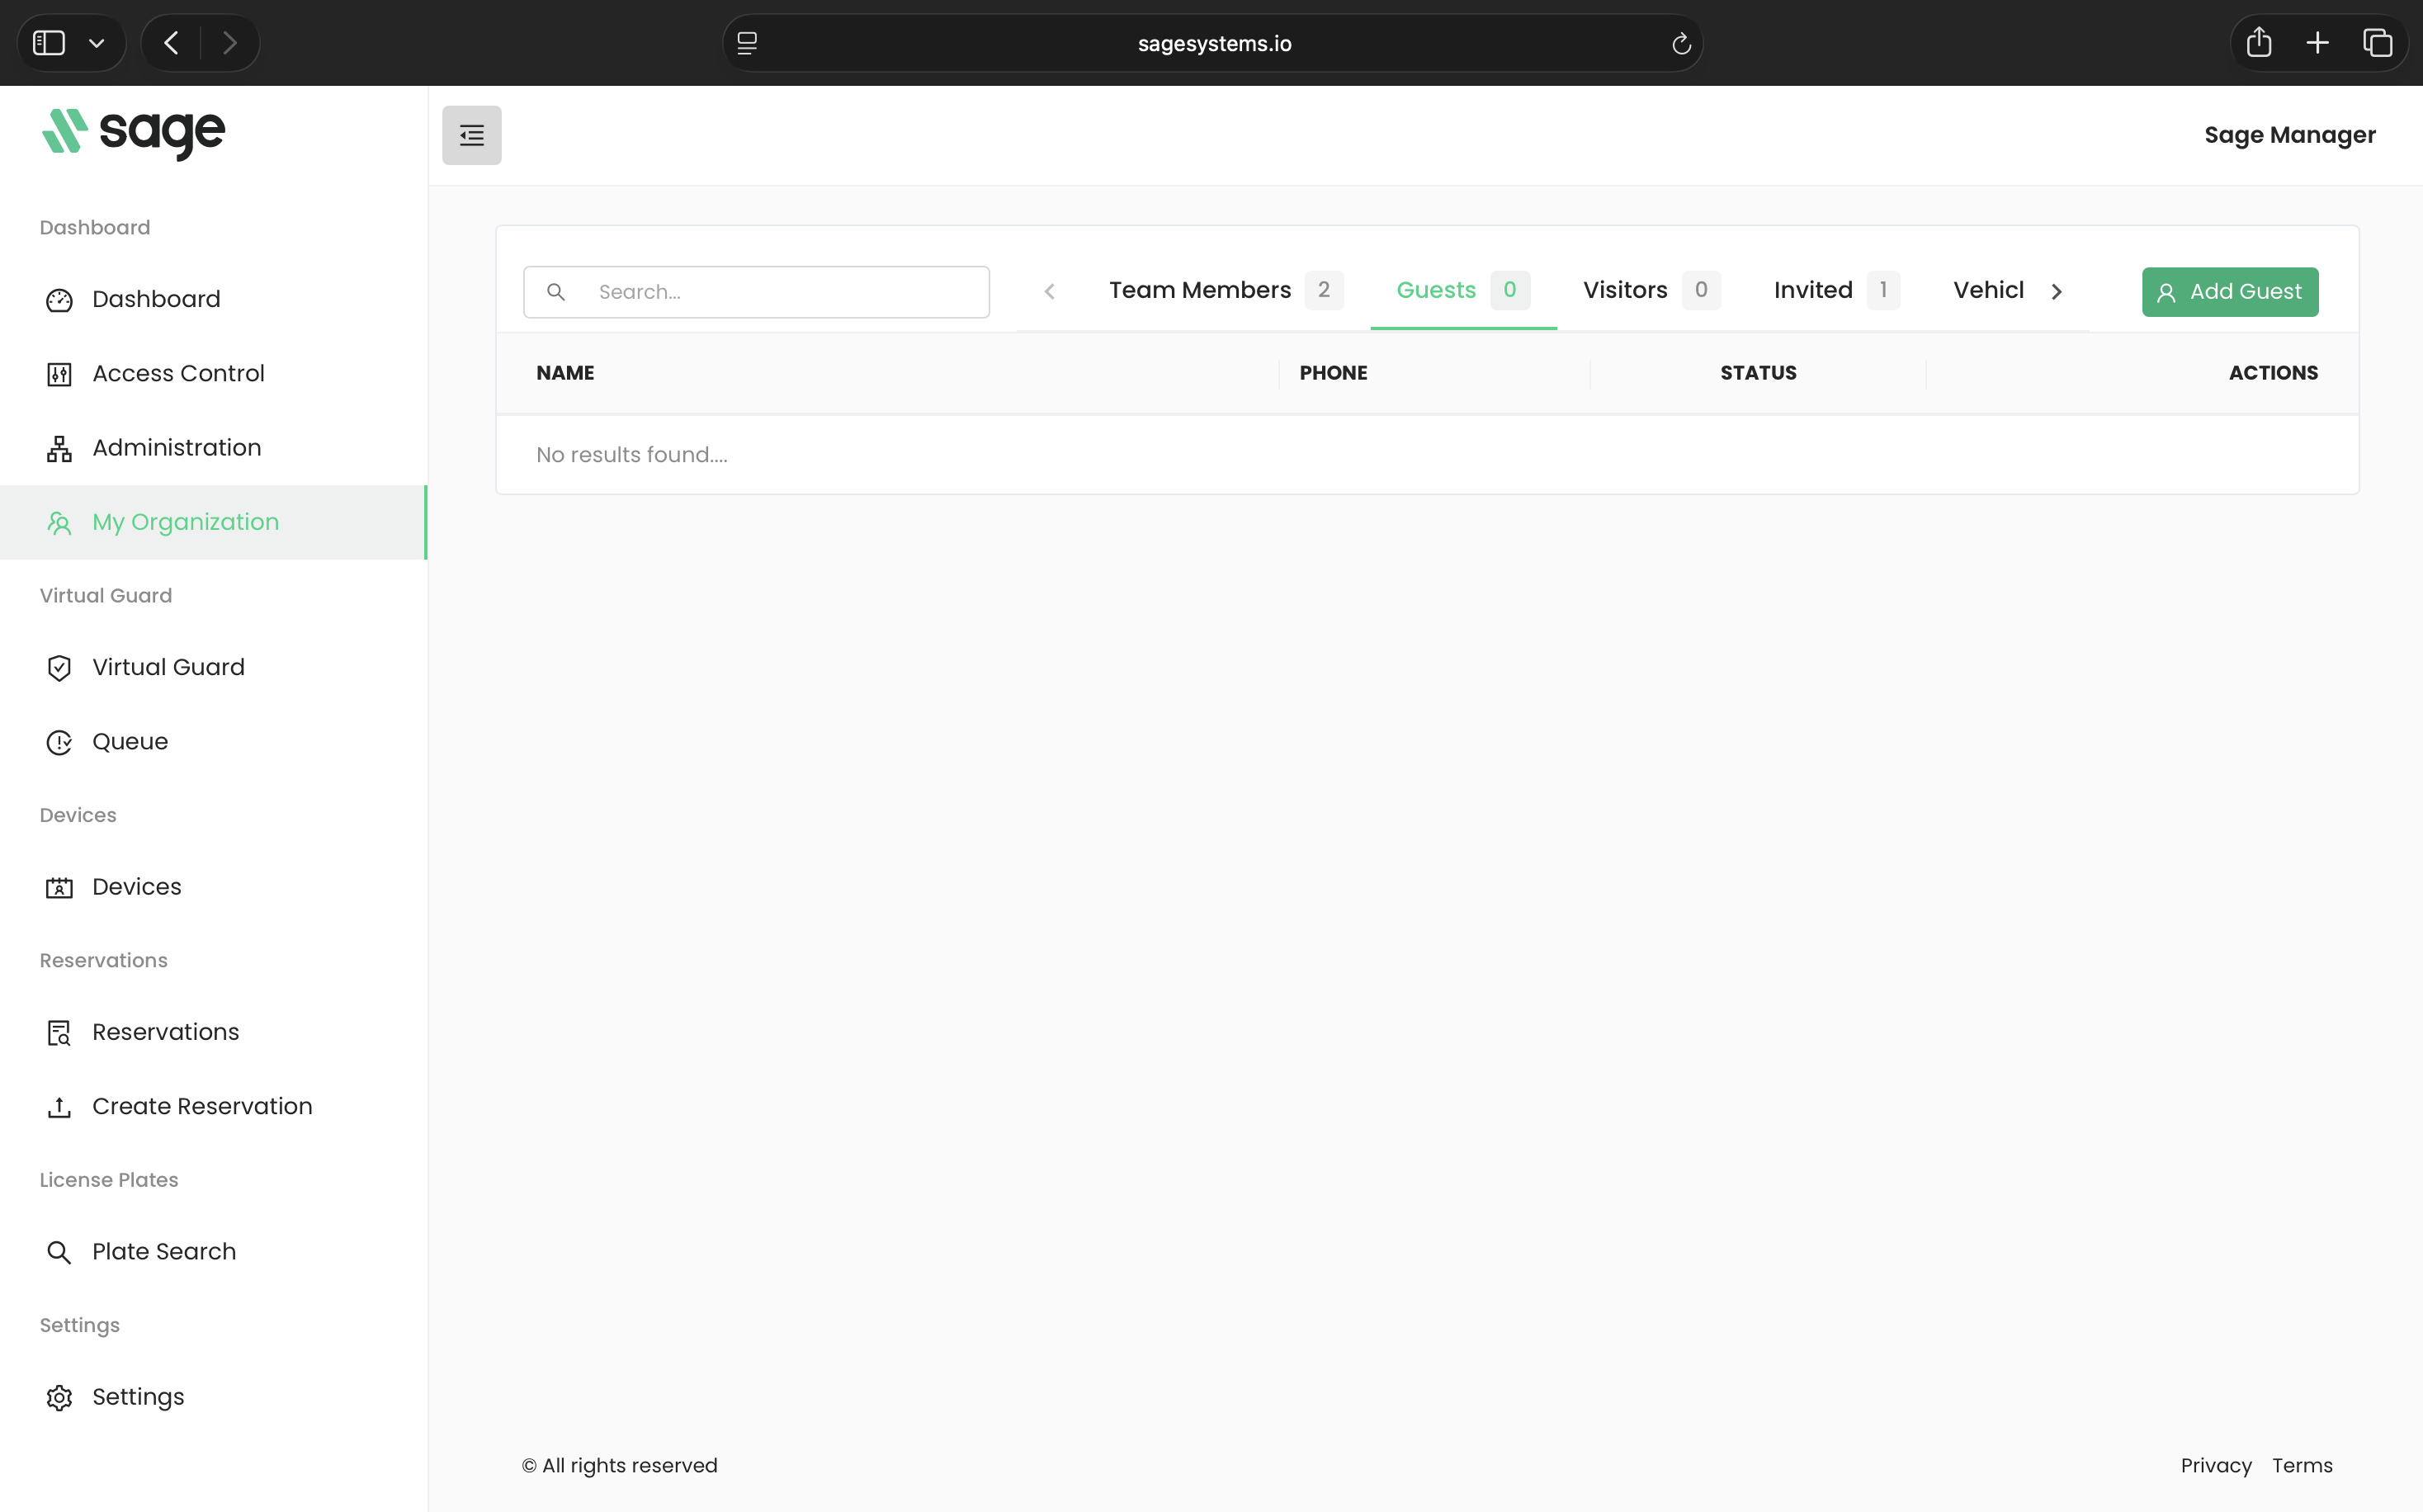
| Guests | People invited to the SAGE app on behalf of the community. | Manage Organization Guests |
| Visitors | People pre-approved by name, without an app invite. | Manage Organization Guests |
| Invited | Team member and guest invitations that haven’t been accepted yet. | Manage Operators |
| Vehicles | Vehicles registered to the community. | Manage Occupant Vehicles |
| Devices | Devices registered to the community. Shown only when your community has the Devices module. | Manage Organization Devices |
| Codes | One-time codes created by the community. | Manage Organization Codes |
Type in the search box above the tabs to filter the open tab.
Add a team member
- Open Team Members and click Add Team Member.
- Enter Manager First Name, Manager Last Name, Manager email, Country Code and Manager Phone. Company name is optional.
- Choose a Role and click Add.
SAGE emails them an invitation with a link to set up their portal access, and they show on the Invited tab until they accept. See Access your account for what they do next. They also get a text message, which points them to the SAGE app rather than the portal.
The role decides what the person can do in the portal. Each role carries a set of permissions, and choosing the role gives them all of its permissions. You can’t change one person’s individual permissions from this form.
Edit or remove a team member
Click a team member to open them. Change their details or role and click Edit. To take away their access to this community, click the trash icon at the bottom left of the form.
Invite a guest
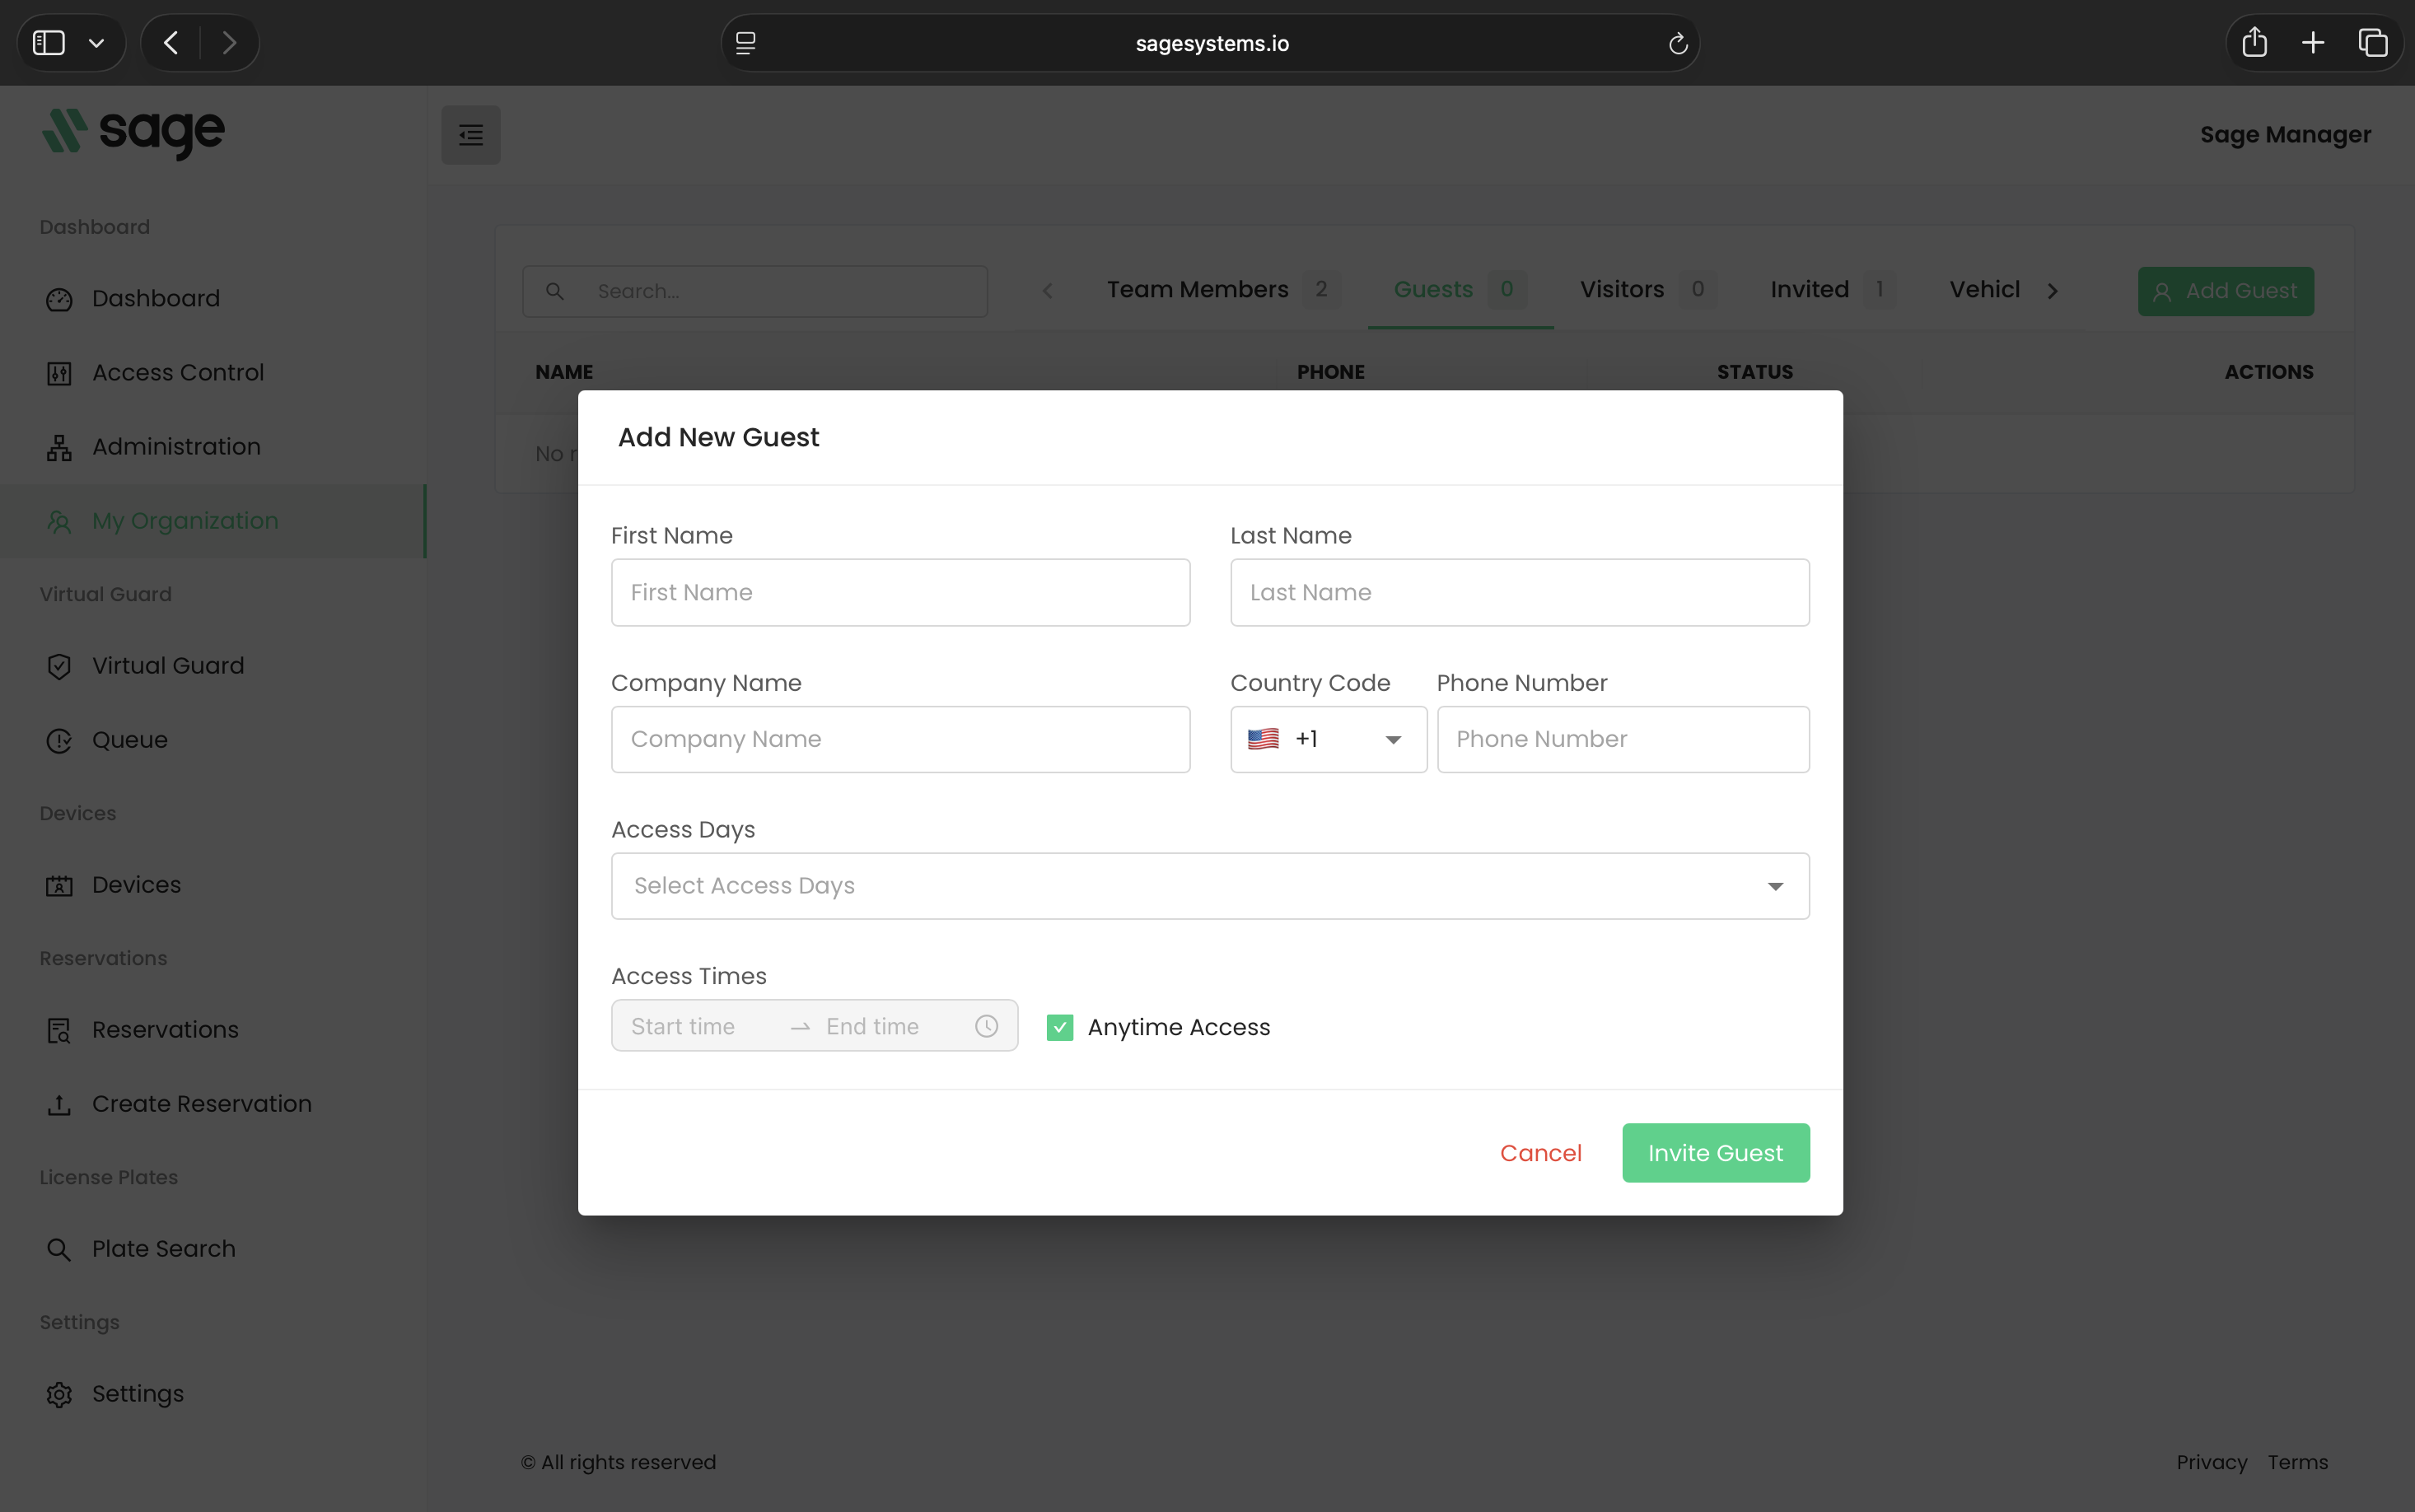
- Open Guests and click Add Guest.
- Enter First Name, Last Name and Phone Number. Company Name is optional.
- Choose the Access Days. Leave Anytime Access ticked, or untick it and set the Access Times.
- Click Invite Guest.
SAGE texts the guest a link to download the SAGE app. They show on the Invited tab until they accept. Once they have, use the menu on their row in Guests to Suspend, Unsuspend or Delete them.
Add a visitor
Visitors are pre-approved by name and don’t get an app invite. Gate staff see them on the Virtual Guard page when someone arrives.
- Open Visitors and click Add Visitor.
- Enter a first and last name, or a company name.
- Choose the Access Days and Access Times, or leave Anytime Access ticked.
- Click Invite Visitor.
Create a one-time code
A code is a six-digit number a visitor, vendor or delivery driver can enter at the gate.
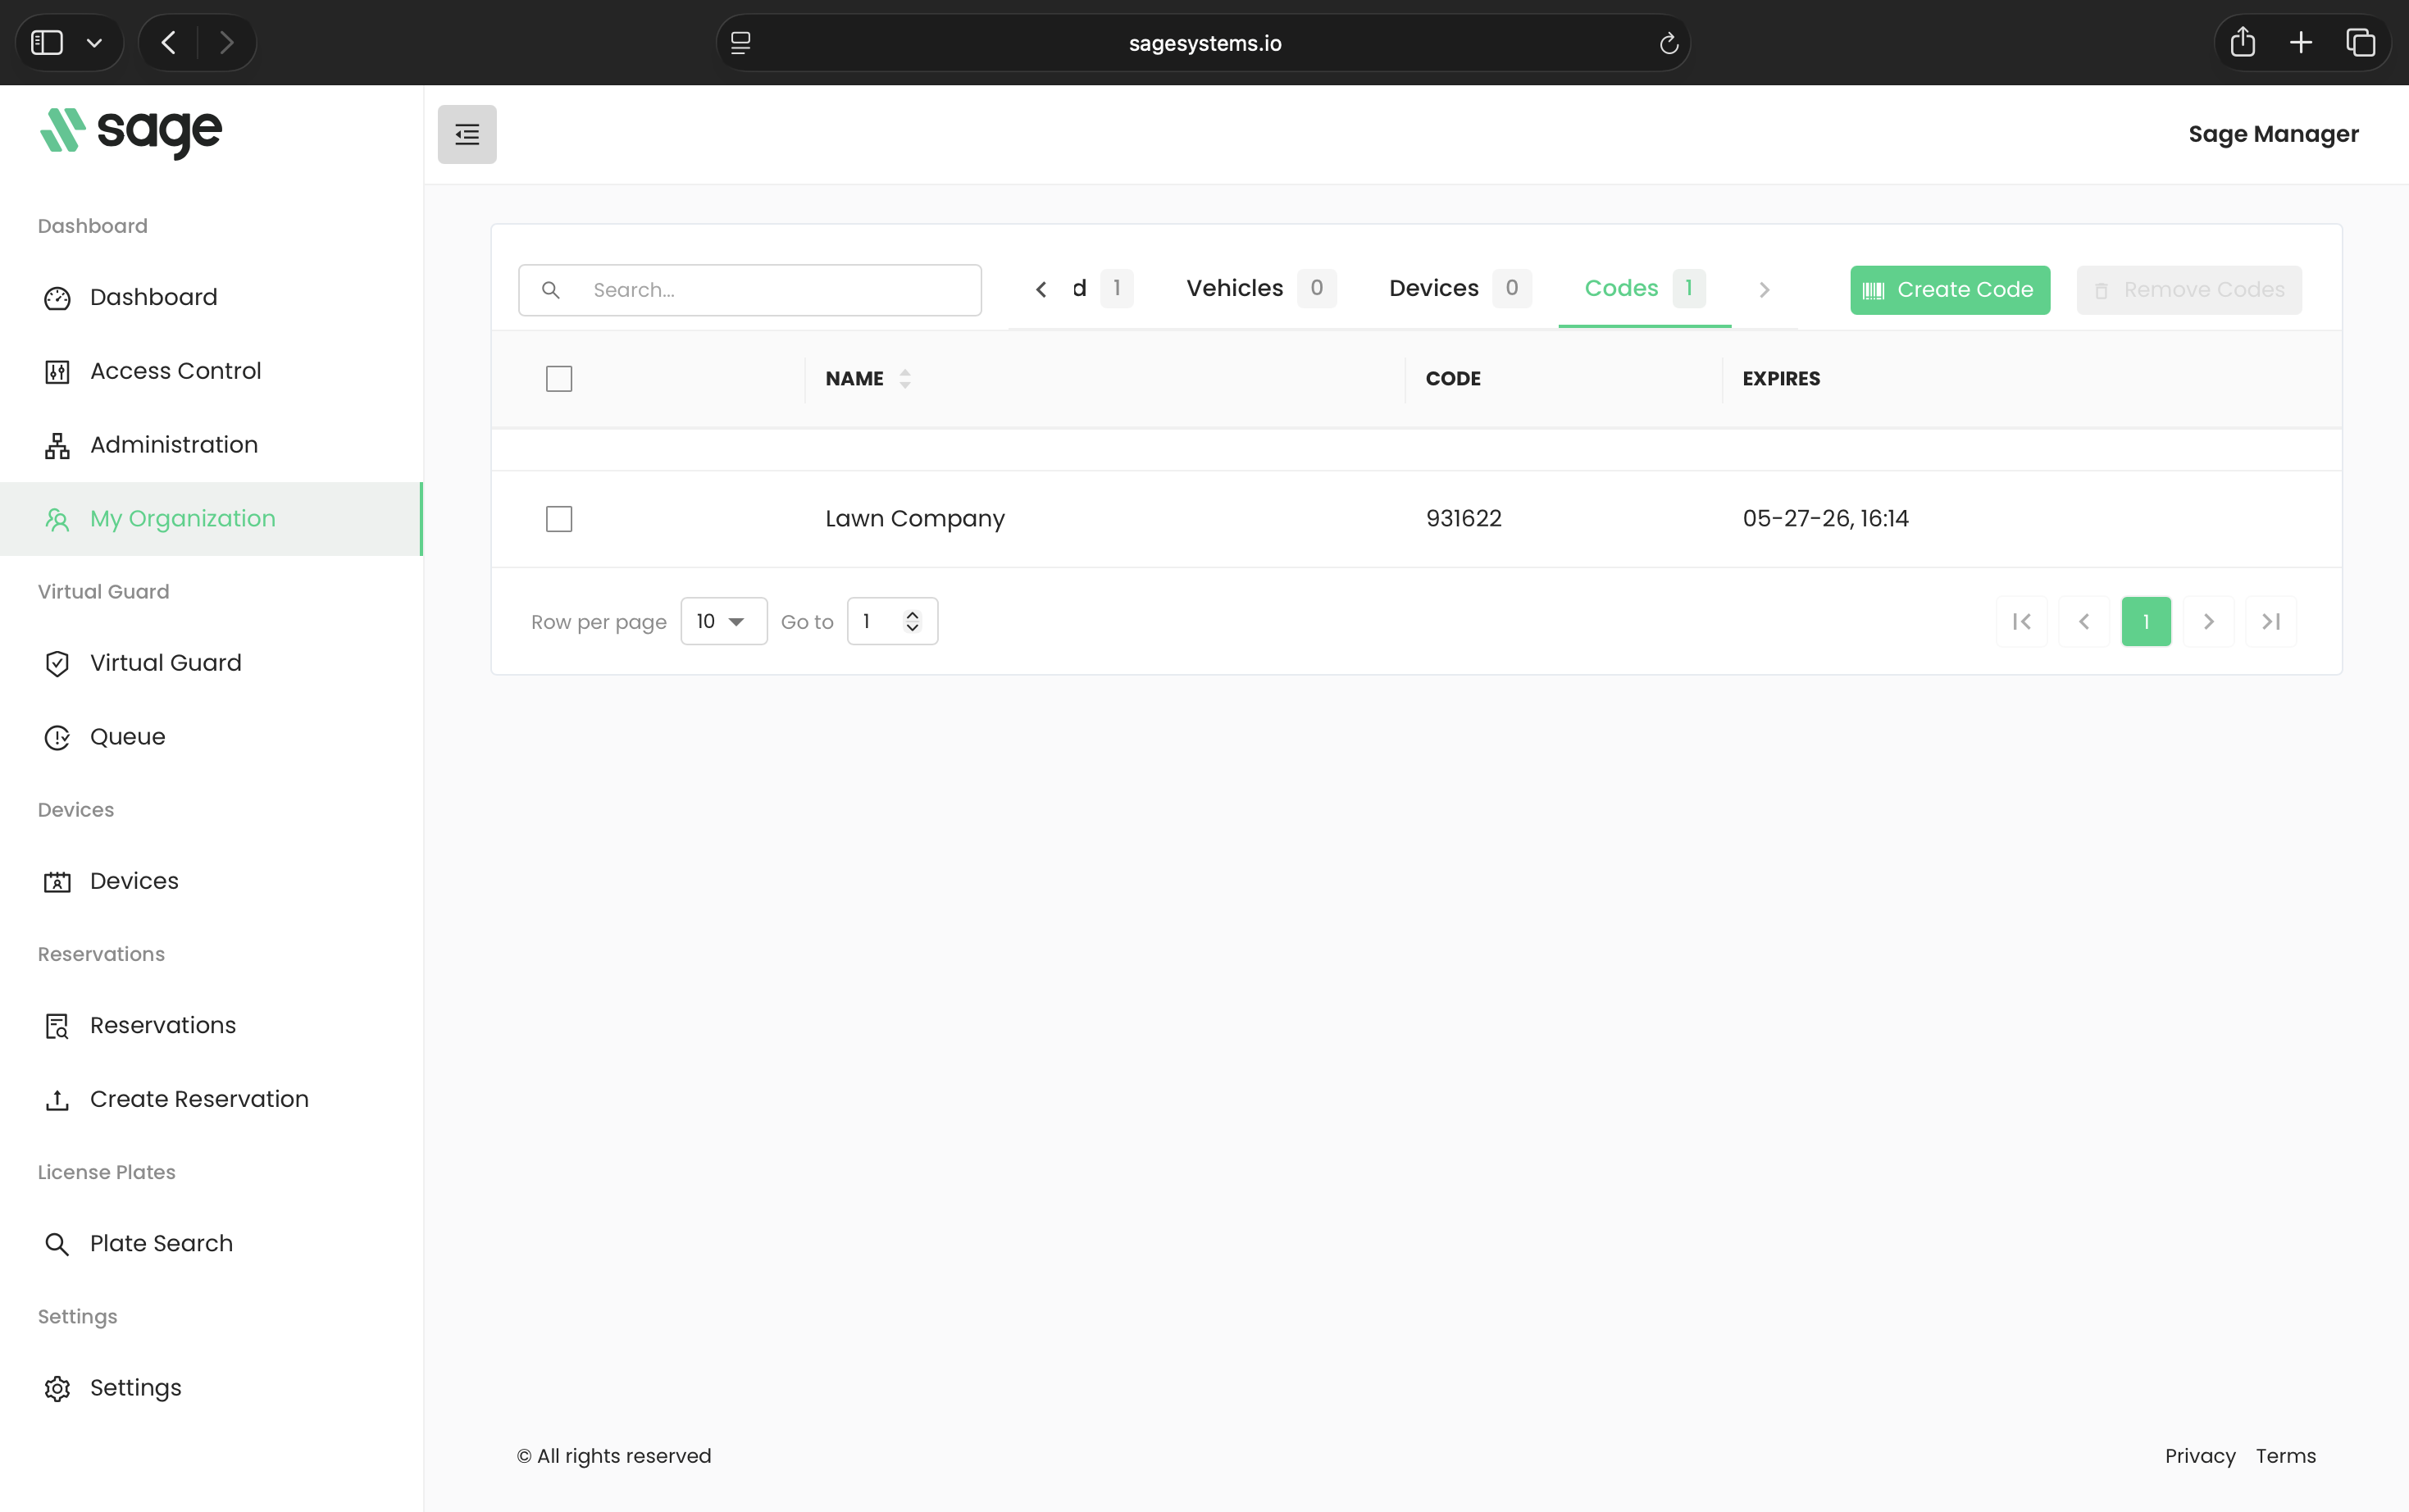
- Open Codes and click Create Code.
- Enter a Full Name or Company Name and set the Activation Date & Time.
- To let the code work more than once, tick Reusable Code and set an Expiration Date & Time at least 1 hour after activation.
- To limit when the code works, tick Restrict Access Days & Hours and choose the Access Days and Access Times.
- Click Generate Code.
The new code appears in the list with its Name, Code and Expires date. Share it with the person yourself.
| Code type | When it stops working |
|---|---|
| Single use (default) | After it’s used once, or 30 days after activation, whichever comes first. |
| Reusable | At the expiration date and time you set. |
To cancel a code, click it, click the trash icon (Revoke Code) and confirm with Revoke. To cancel several at once, tick them and click Remove Codes.
The form notes that some site restrictions may need SAGE Support to turn them on. If a restricted code doesn’t behave as expected, contact support@sagesystems.io.
Need help?
Questions? Contact us at support@sagesystems.io.